Getting an Analog Image on a Digital Screen
As someone who photographs on film in a decidedly digital age, there's a lot of
extra processing to be done before I can get a photo online. There's the physical processes of
developing and scanning the film (both of which have many options for preferences and refinement), but
then there's the digital process of editing those scans. This part can be all but totally skipped if
you produce an analogue print and then scan that, but that requires a darkroom and a totally different
set of skills (I learned how to print black and white in the darkroom many years ago, but never color).
So the vast majority of contempary film photographers, both professional and hobbyist, have a hybrid
workflow, unless they let a lab handle scanning.
You might think that converting a negative would be best left to the film
scanning software (and these days, it's really not that bad), but if you want to make further
edits, you tend to lose a lot of latitude from the resulting files. The most sharpness and dynamic
range comes from the raw, unprocessed scan, giving you a very workable .DNG file. Similarly, simply
inverting the curves in Lightroom (my editing platform of choice and prerequisite for using the
subject of this blog) is not sufficient; involved tweaks for each image is required. Though it can
be easy to learn how to edit the curves and achieve acceptable results, the process is very time
consuming, and can be difficult to get the exact results you want without a lot more learning.
Negative Lab Pro steps in to make
this process an absolute breeze!
What is Negative Lab Pro?
Negative Lab Pro (or NLP) is a plugin for Adobe
Lightroom. Right out of the gate, I want to point out that it cost $99, which is quite expensive, but
this is by far the best solution for converting negatives that I've tried. Plus, it's cheaper over time
than paying for lab scans (and gives you more control over the outcome).
Of course, there are many variables that affect color and contrast in film
photos. However, if you've taken a look at other photos shot on a certain film stock and are
disappointed by your own results, give NLP a try. There's a 2 image free trial (not exactly generous,
but should be enough to get the idea).
My Workflow with Negative Lab Pro
There is an initial, small learning curve, and while I'm not trying to give a
full tutorial (check out the getting started guide
here), I'd like to share an overview of the
workflow, and a few results. I'm using a Plustek 8200i SE with Silverfast 9, so my workflow will be
different from someone using a digital camera to scan.
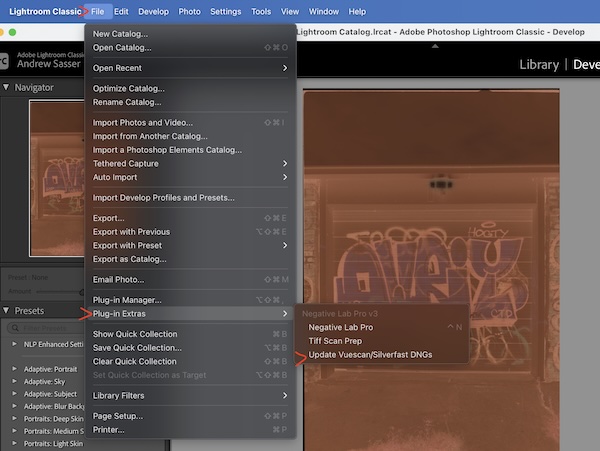
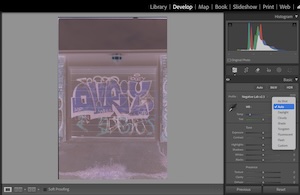
After importing the negative scans into Lightroom, the profiles for each image
must be updated to NLP's own Vuescan/Silverfast profile. This is the only step I do as a
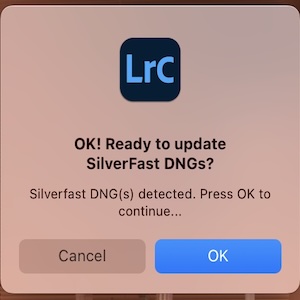
batch. Select all the images, then go to File > Plug-in Extras > Update Vuescan/Silverfast DNGs:
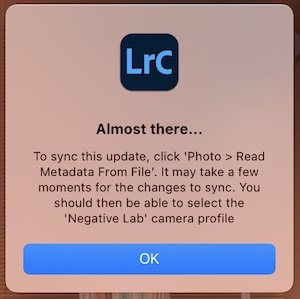
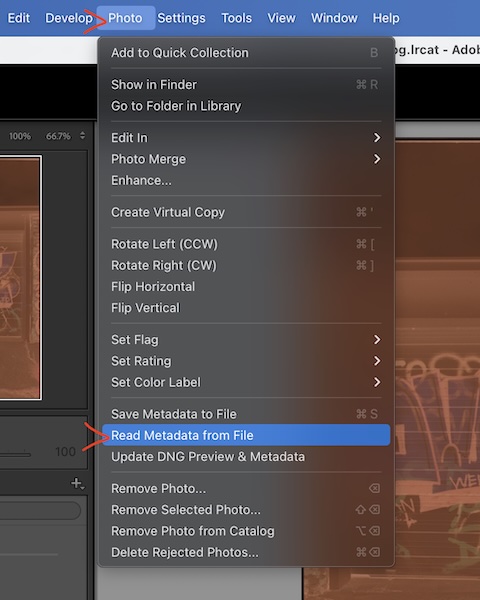
You'll then be prompted to sync the update by reading the metadata from file,
which (as far as I can figure) has to be done one at a time for each image.
Next is the white balance, which can be done a couple of ways, but I've really had best results with just choosing Lightroom's Auto.
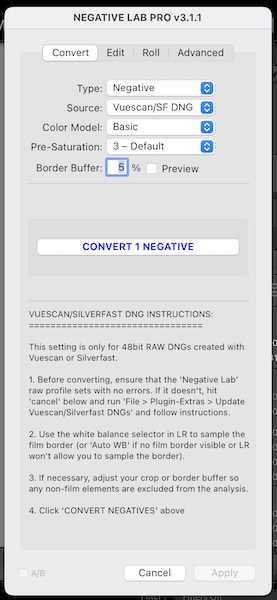
It's finally time to see what NLP can do. Control+N will bring up the dialog box, and then just click "Convert 1 Negative" (there's several options here, but again, so far I've really liked the results from the defaults).
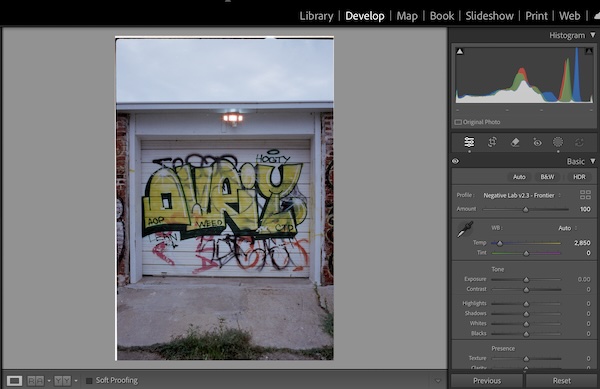
This one was shot on Cinestill 800T
How I Learned to Stop Worrying and Love the Auto
There are a lot of different approaches you can take during these steps,
including how you whitebalance, many different profiles for film stocks in NLP, as well as editing
further after the conversion. However, I'm really enjoying just letting go and letting the software
handle most things with defaults and auto adjustments.
I'm not making some sort of master print, dodging and burning, going over every
square millimeter with a loupe, and honestly most of my photos don't warrant that kind of approach. I
take a lot of snapshots, and so I want my editing workflow to feel just as uncomplicated, emphasizing
the flow of it all. NLP really facilitates that approach, and while there are cheaper options
(excellent open source software like Darktable), I think it's
worth spending the money to get the kind of expediency I want in my photography process.
← back